
Suggested Views For New Workspaces
In this guide, you'll learn how to set up a recommended view structure for reply handling — including the exact filters, labels, and logic behind each view — so your inbox stays organized and no important reply gets missed.
Whenever a new workspace is created, setting up views in a specific way from the start keeps reply handling organized and ensures nothing slips through.
Before you start: Views are built using Filters. If you haven't set up your labels and filters yet, refer to How to Create a Label and How to Set Up a Filter in a Workspace first — the views below depend on those being in place.
The Recommended View Structure
View 1 — Positive Needs Reply
This is the most important view. It shows positive replies that still need a response from you.
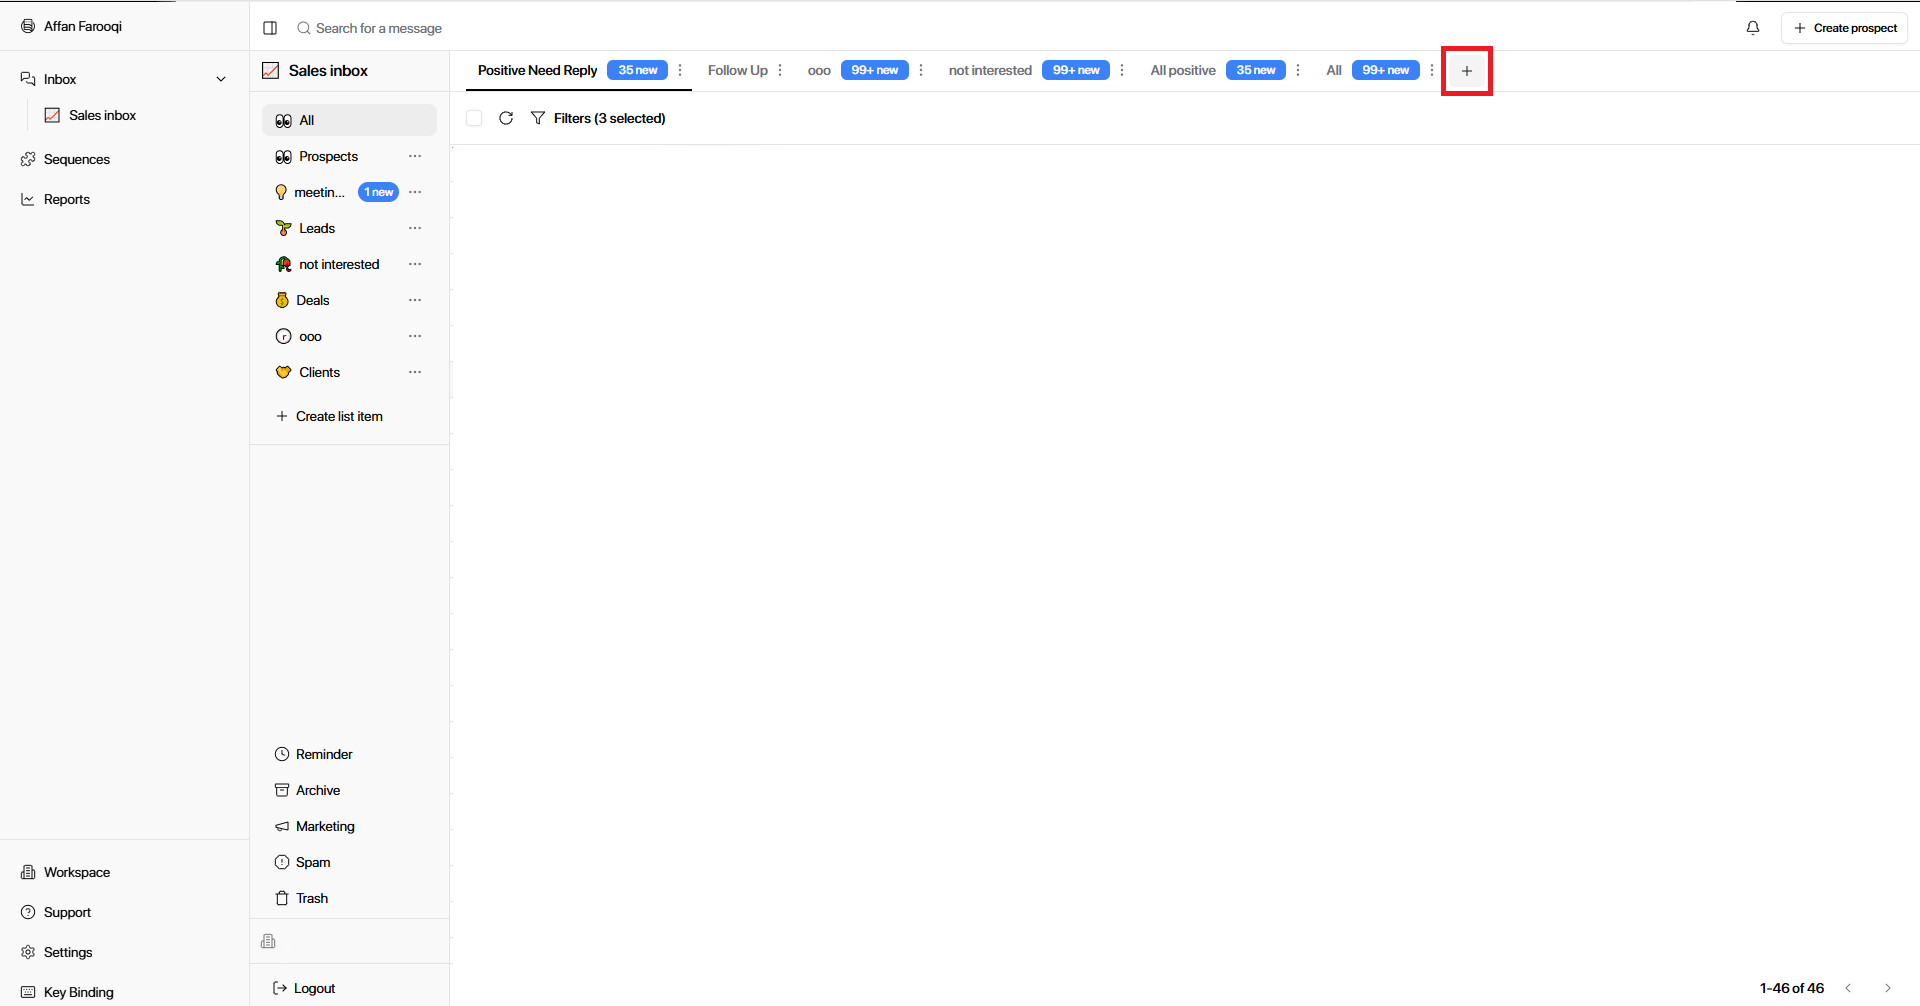
Click the + icon at the top of the workspace to create a new filter.
Set condition: Last message from → Equals → Prospect
Add condition: Label → OR → Interested, Information Request, Meeting Request
Save and name the view: Positive Needs Reply
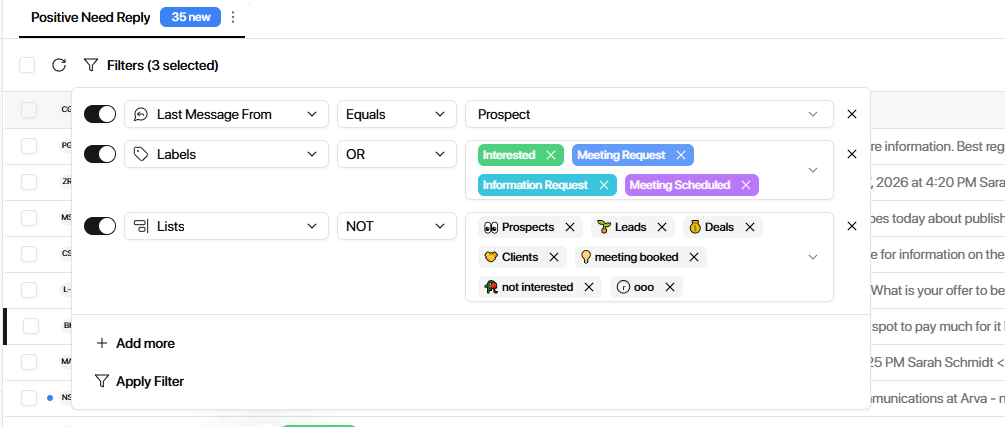
Without this filter, replies like Not Interested, DNC, Wrong Person, and Out of Office all mix in with your hot leads. This view strips the noise and shows only replies that actually need your attention right now.
View 2 — Follow-Up (Positive) This view shows conversations where you've already replied to a positive prospect — but they haven't responded back yet.
Create a new filter.
Set condition: Last message from → Equals → Me
Add condition: Label → OR → Interested, Information Request, Meeting Request
Save and name the view: Follow-Up (Positive)
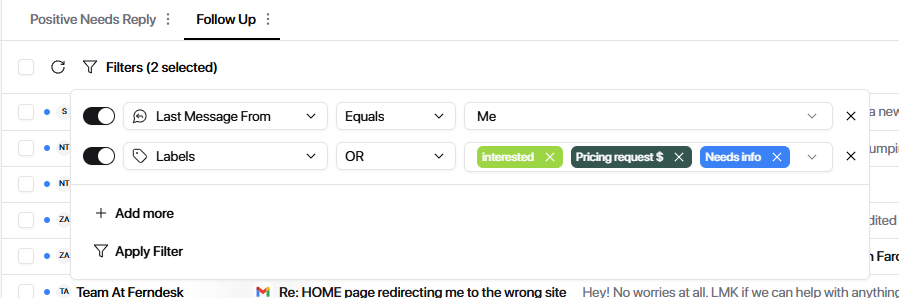
This is where deals quietly die. If someone showed interest and you asked for a call but they never replied — they sit here. Check this view regularly to catch conversations that need a nudge before they go cold.
View 3 — Out of Office This view tracks prospects who are currently unavailable so you know when to circle back.
Create a new filter.
Set condition: Label → OR → Out of Office, OOO Sequence
Save and name the view: Out of Office
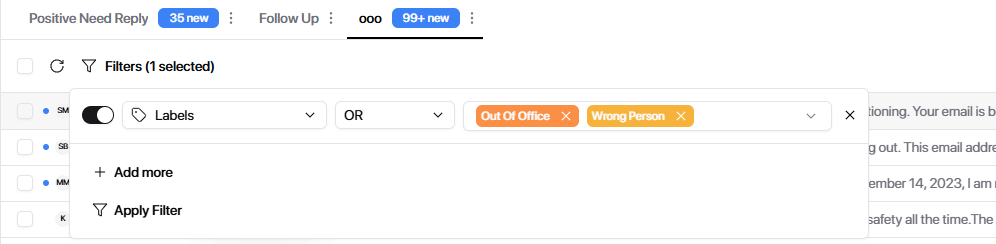
This isn't a reply-now view — it's a timing view. Use it to plan follow-ups for when prospects are back. Without it, out-of-office replies get buried and the follow-up never happens.
View 4 — Not Interested / DNC This view tracks negative replies — not for action, but for visibility and reporting.
Create a new filter.
Set condition: Label → OR → Not Interested, Not Right Now, DNC, Block List
Save and name the view: Not Interested / DNC
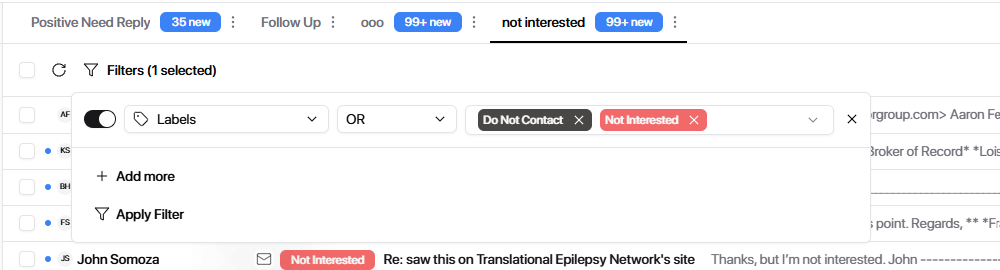
This view is mainly for tracking. Comparing the volume of negative replies against positive ones gives you a real signal on campaign quality. A high ratio of DNC and Not Interested replies usually means targeting or messaging needs adjustment.
View 5 — All Always keep one view with no filters applied.
Create a new filter.
Add no conditions — leave it empty.
Save and name the view: All
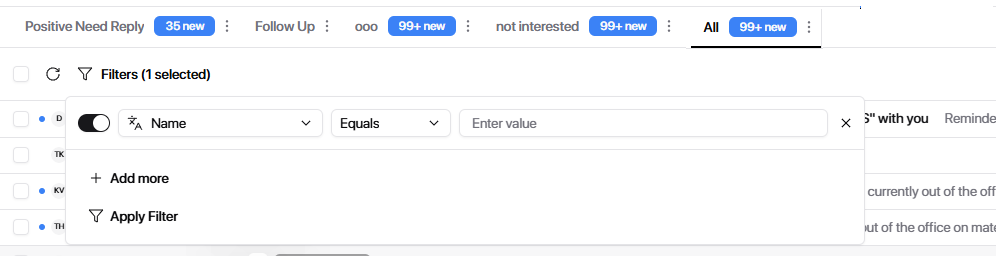
Never remove this view. It's your safety net — a way to quickly scan everything in one place and catch anything that hasn't been labeled yet or slipped through your other views.
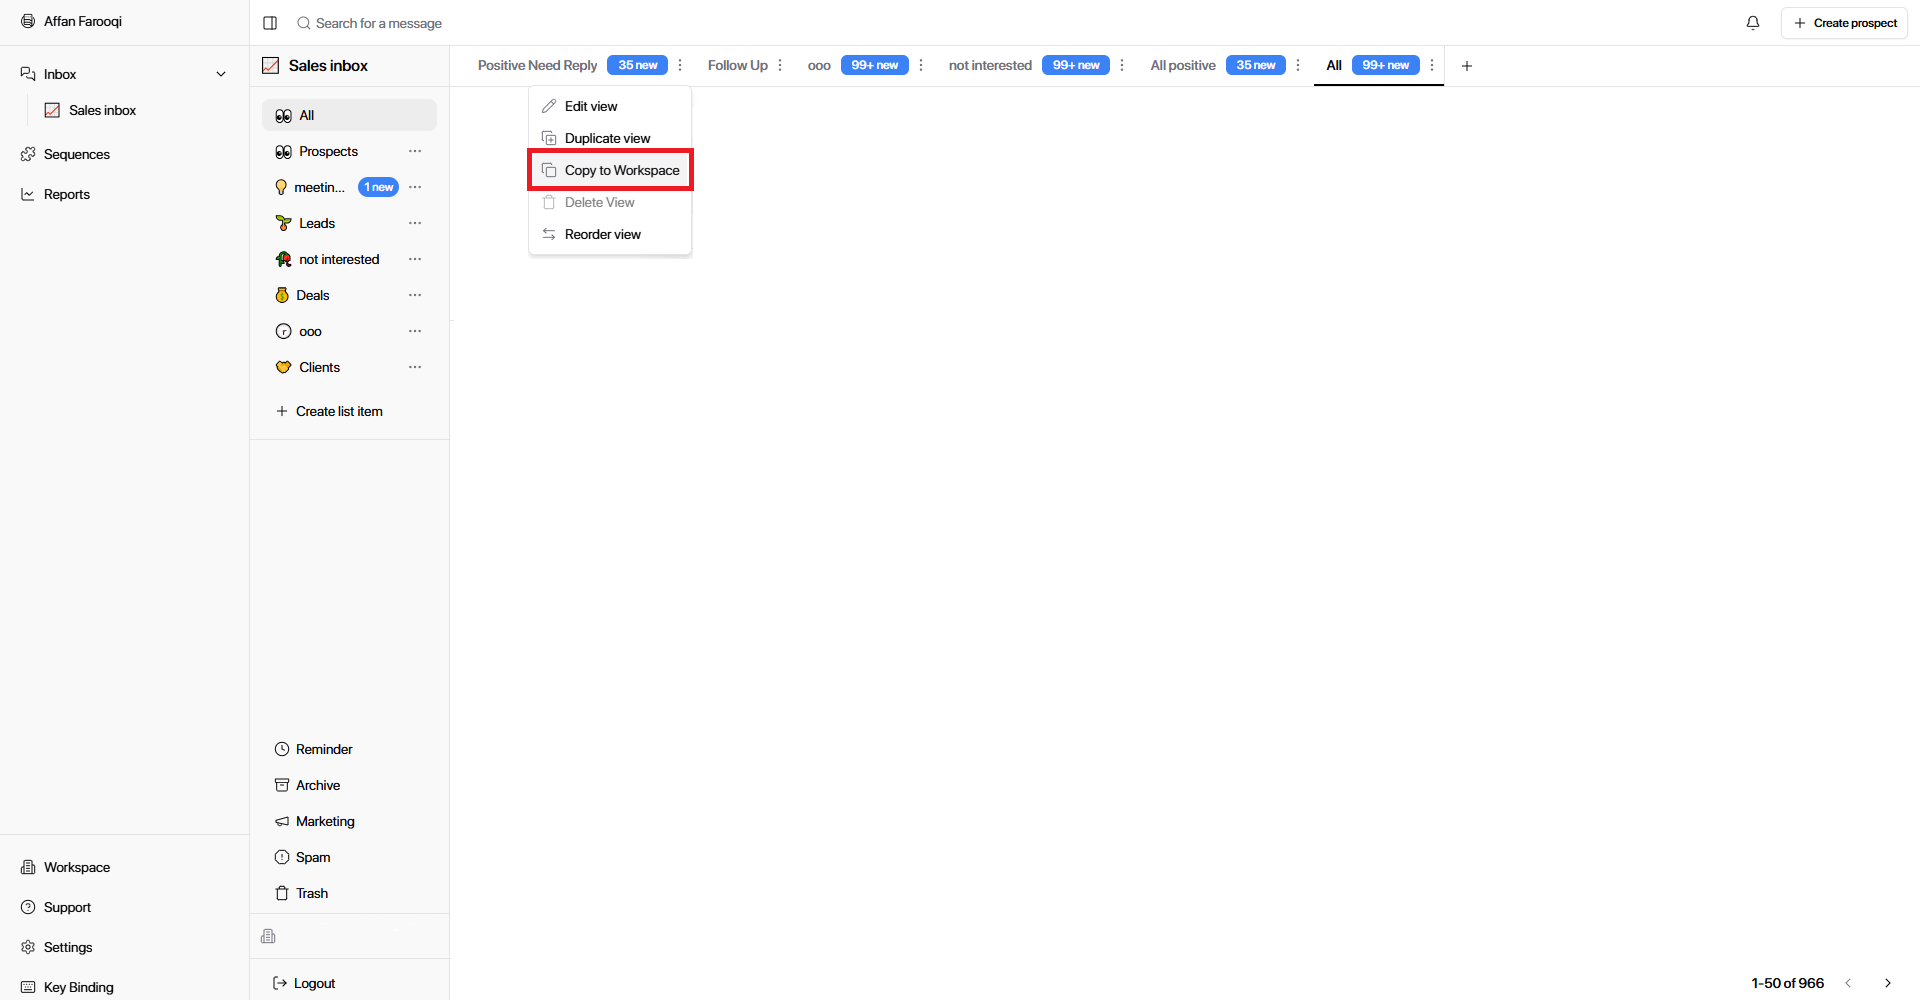
Copying Views to Another Workspace
Once your view structure is set up in one workspace, you can copy it directly to any other workspace — no rebuilding needed.
Click the three dots (⋯) next to the view you want to copy.
Select Copy to Workspace.
Choose the destination workspace.
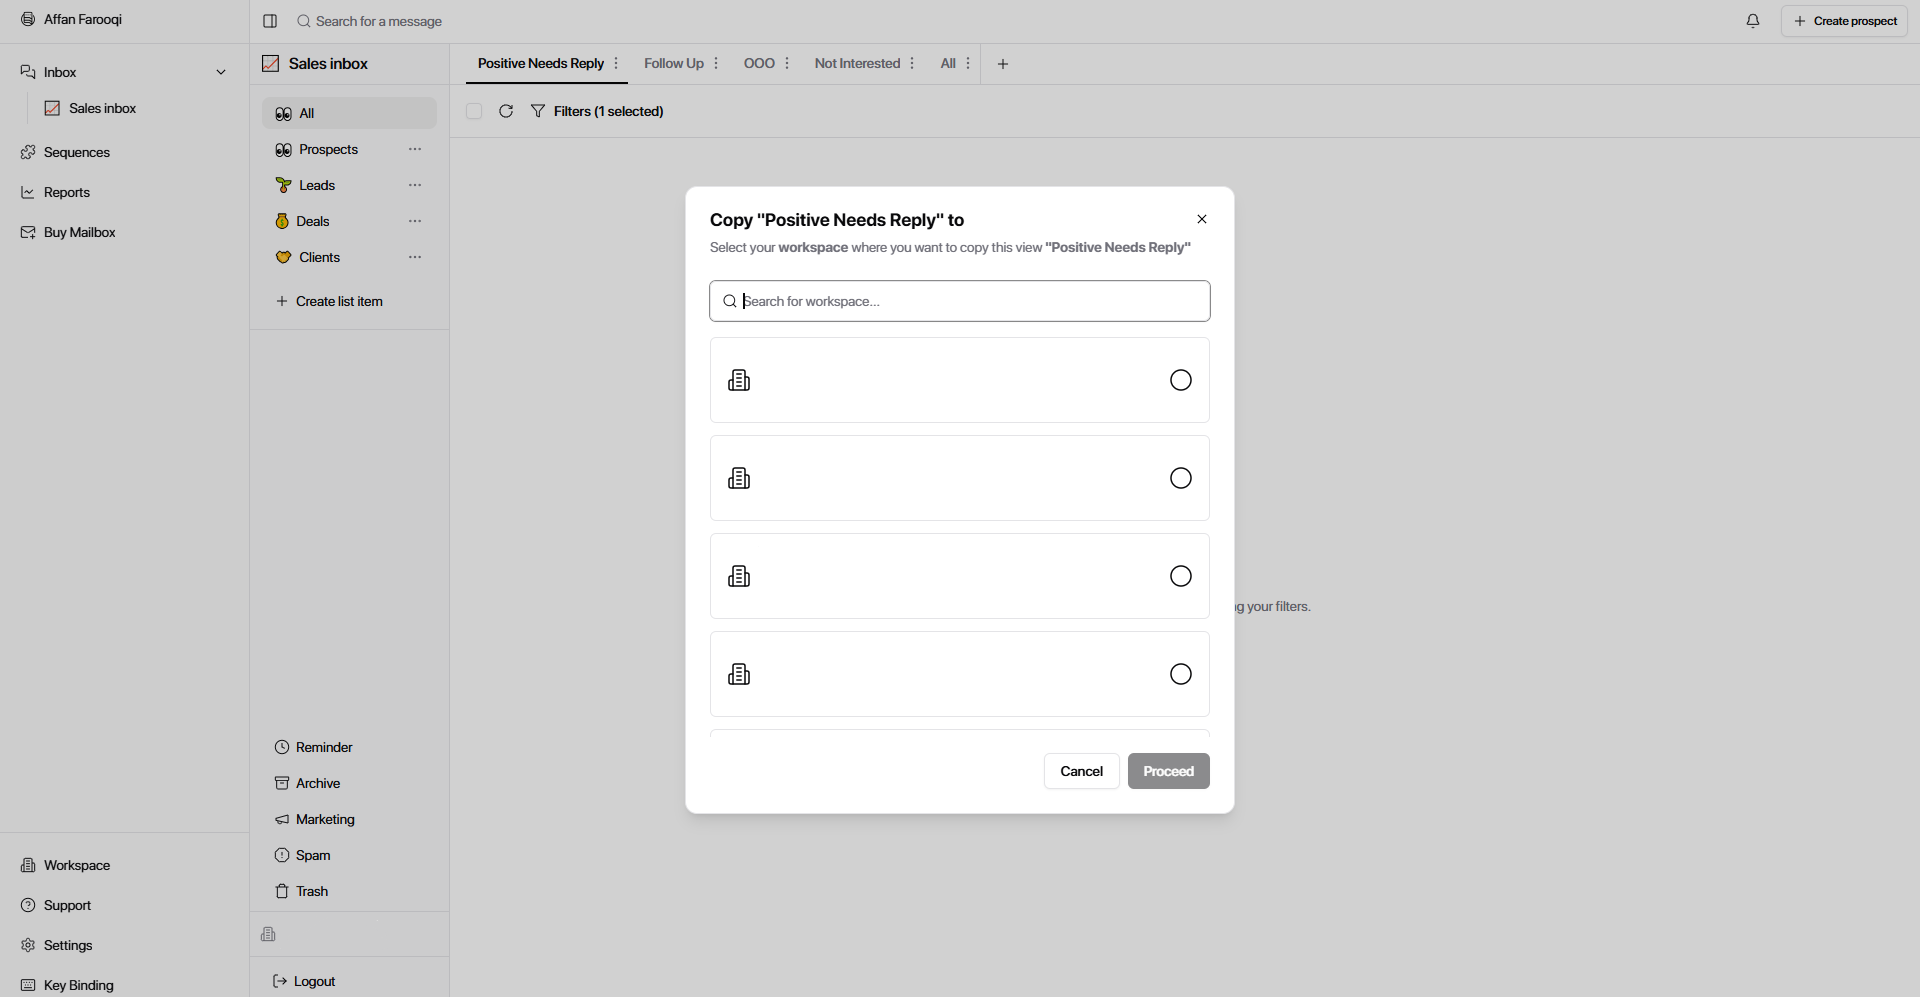
The view is added instantly with the same filter conditions.
Set up this view structure in your first workspace, then copy it to every new client workspace you create. It takes seconds and ensures every workspace starts with the same organized reply handling system from day one.
With these five views in place, your inbox answers one clear question at all times: what needs my attention right now? Positive replies surface first, follow-ups don't get forgotten, out-of-office prospects are tracked, and nothing gets missed in the All view.